I promise that this will be the last I write about RV toilets for a very long time. I don’t think I could even tally up the amount of hours I’ve spent trying to solve the odor problem in our Roadtrek. We’ve been to the Roadtrek factory in Canada and 2 Roadtrek service centers multiple times but they could not solve the problem. It’s exhausting listening to the same questions over and over again from the service center, like:
Do you make sure that there is water in the bowl of the toilet at all times?
Do you make sure that there is water in all of your P-traps?
Are you sure the odor isn’t coming from your grey tank?
Do you clean the black tank after every use?
Did you forget to use a tank deodorizer?
These are all great questions to ask when troubleshooting an odor problem – but we knew what the problem was – we reported to the dealer and Roadtrek what the problem was – and finally after 4+ attempts we fixed it ourselves. Just as others have reported – the Thetford toilet was the problem and replacing it immediately fixed our odor issue.
In our opinion the Thetford toilet has a critical design flaw. When the waste drops from the Thetford bowl into the black tank, it drops past a section of the toilet that is open to the inside body of the toilet. It’s not a problem if the toilet is properly sealed to the flange and all seams are property bonded together during manufacturing. It IS a problem if they are not, and I can’t imagine how we could have been lucky enough to get 2 toilets that had the same problem.
We searched long and far for a toilet that would fit in the same space as the Thetford Aqua Magic V. Not only does the toilet flange have to fit with an offset of about 7 1/2 inches off of the back wall, it also sits on a shelf in the Roadtrek wet bath so it must be the low profile model. The only close match that we were able to find was the Dometic 300 Series. Since it’s a special order item we had no way to measure to be sure it would fit. It was a risk worth taking since we felt that there was nowhere else to turn.
When you put the Thetford and Dometic side by side the difference in size is noticeable. The Dometic is larger and is just slightly higher than the Aqua Magic V. What I didn’t like about either of them was how inexpensive they look and feel. If I had a choice I would have replaced it with a China bowl toilet – I can’t believe no one makes one that would fit.
Despite the larger footprint I was relieved to learn that the Dometic actually fit in the Roadtrek wet bath. I got everything temporarily fit into place then I realized that it wasn’t quite a perfect fit after all. When I lifted the seat I realized that the right side was rubbing against the corner of the shower surround. The Roadtrek has a slight bump in the back corner to allow room for the vent pipe. At this point we were willing to do anything to get this to fit. So out comes the Dremel to shave down the toilet seat. A warning to others – plastic gets molten when you’re cutting it with a Dremel, and boy does it burn! The actual lid needed no modifications, but I had to slice about a 1/2 inch of the seat off. It really isn’t a big deal and doesn’t affect performance at all. The water line also needed some modifications to work with the Dometic, but these parts were readily available at our local hardware store.
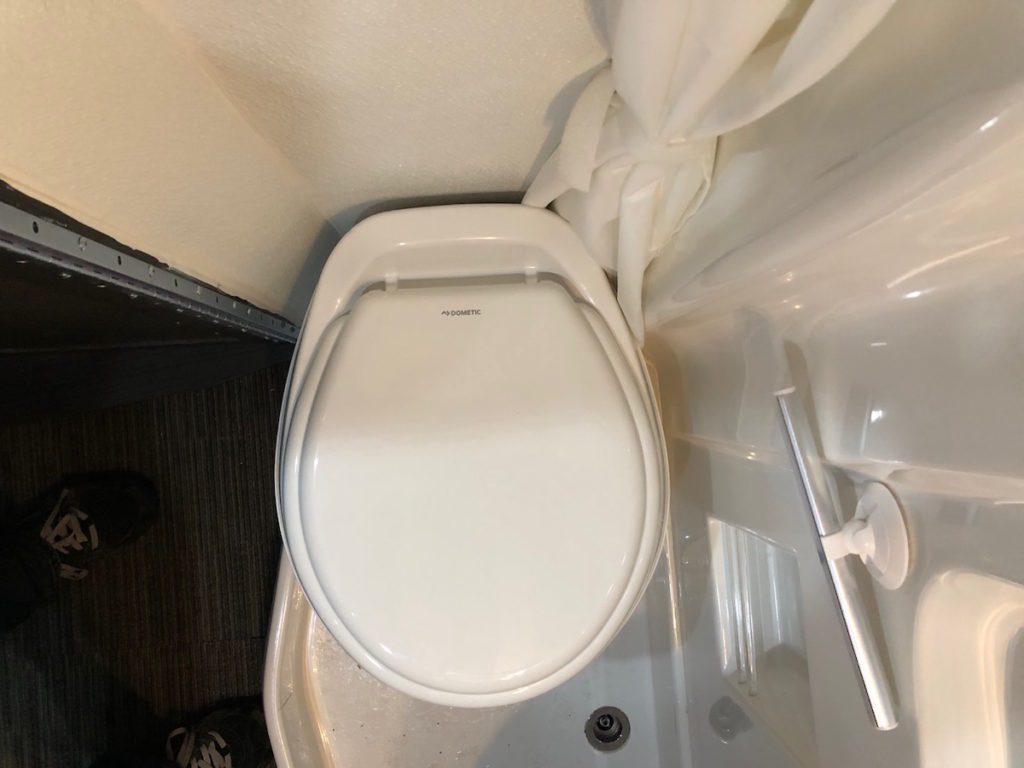
The new Dometic toilet is a perfect fit, until…
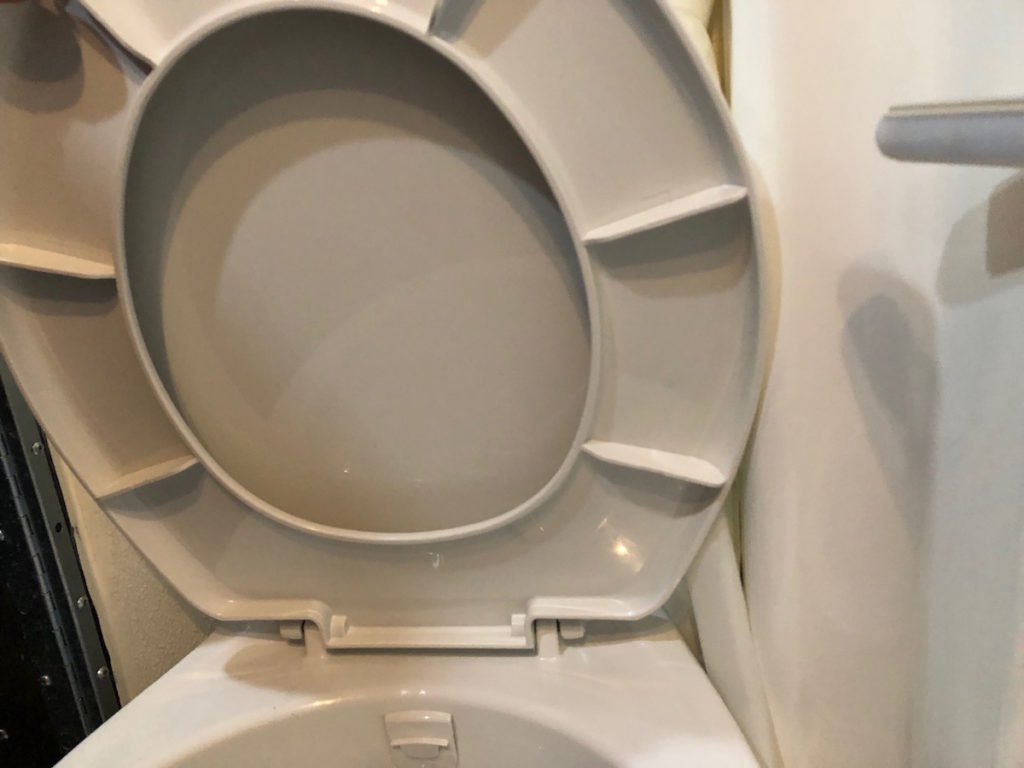
Lift the seat and you can see how the right side hits the corner of the wet bath
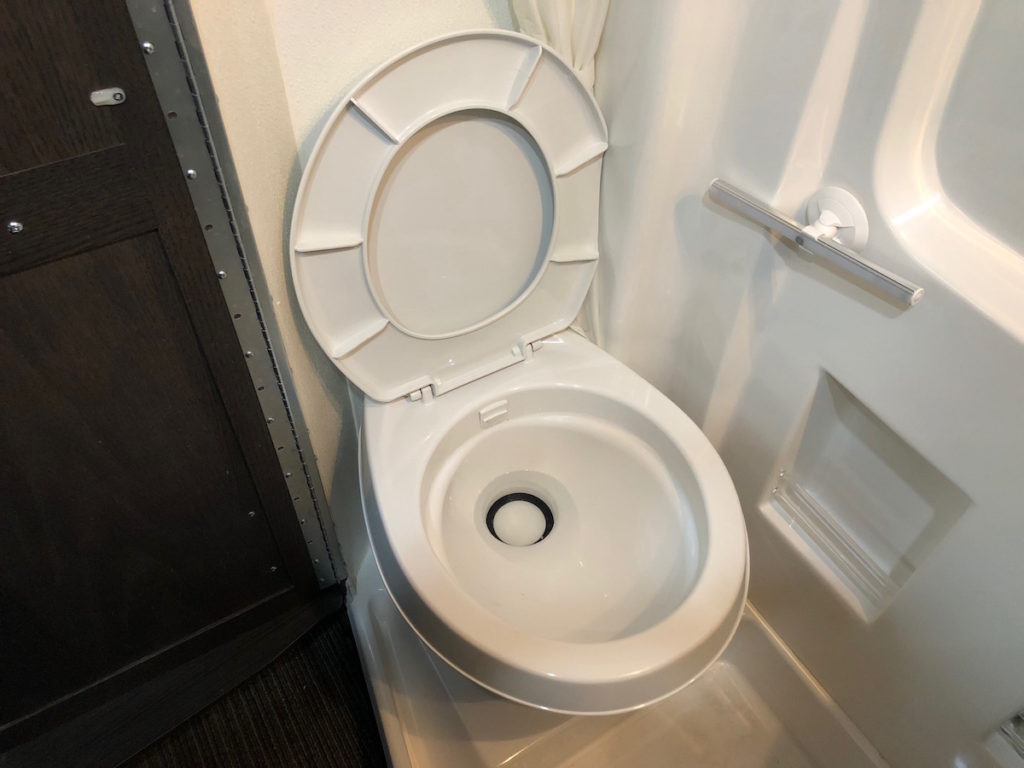
The seat now clears the corner bump after some cutting
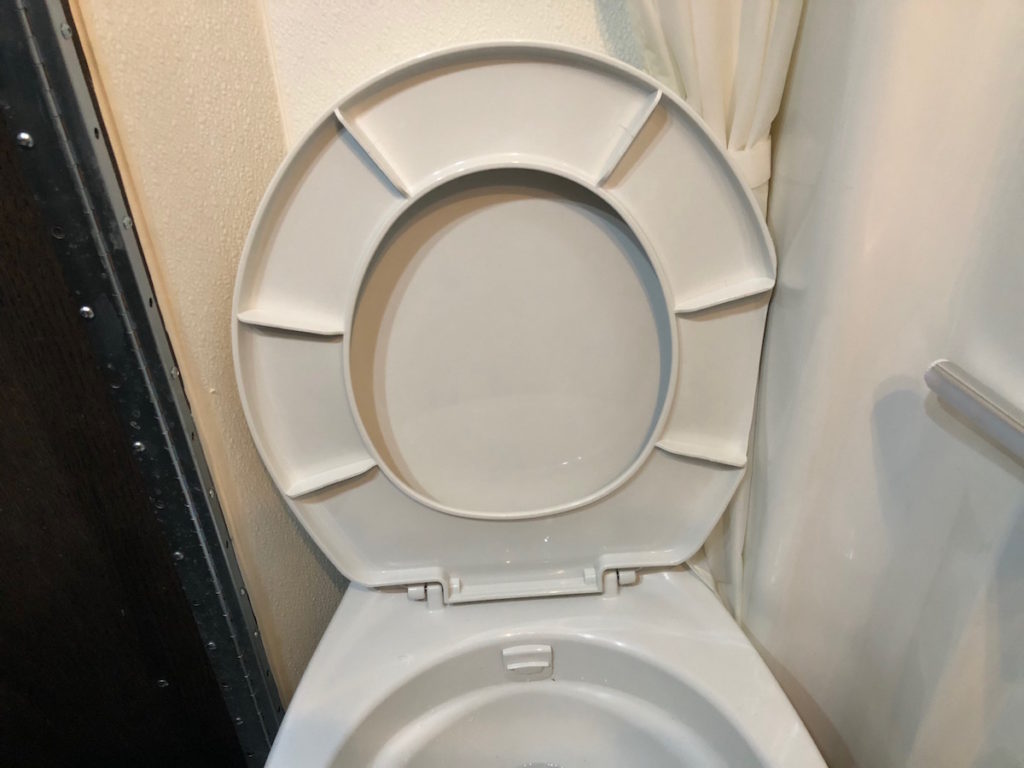
A closer look at the modified toilet seat
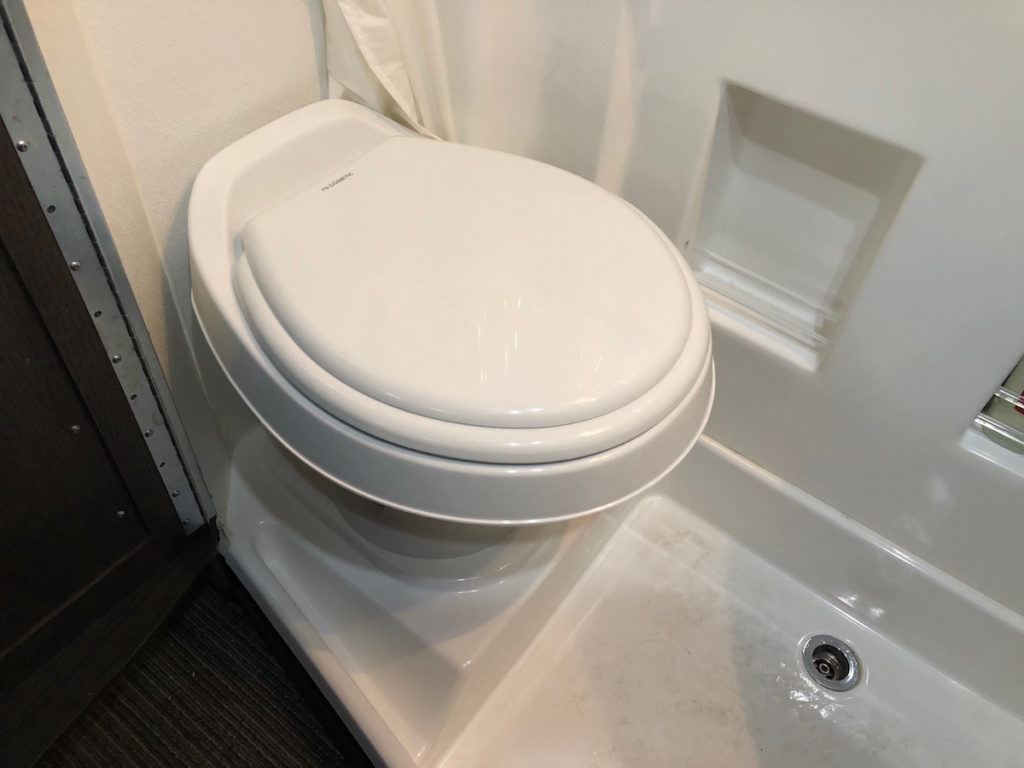
With the seat cover down you can’t even tell that it’s been modified
I’m relieved to report that the toilet problem is finally solved! We’ve taken several road trips since installation and haven’t had any odor issues. Is it a perfect solution – absolutely not. Does the toilet look a little strange with a slice taken out of the toilet seat – maybe a little. Does the cheap plastic toilet creak when you sit on it as others have reported – yep.
Now that we have a working solution, we wanted to get to the bottom of the waste issues with the Thetford. We flipped the toilet upside down and filled the inside of the toilet cavity with water. When installed, this chamber would be open to the black tank, so if water leaked anywhere this could be the source of the odor. Sure enough the toilet immediately began to leak out of the seam at the rear of the toilet. How could something so obvious be overlooked so many times.
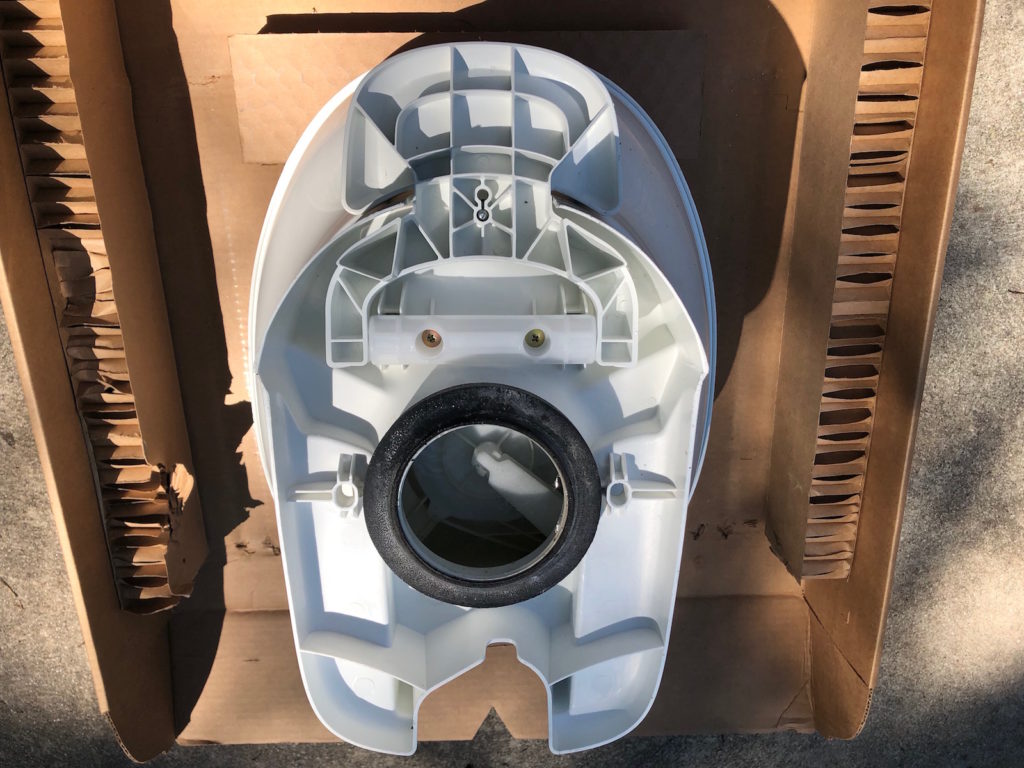
Our old Thetford toilet upside down – getting ready to fill the inside with water
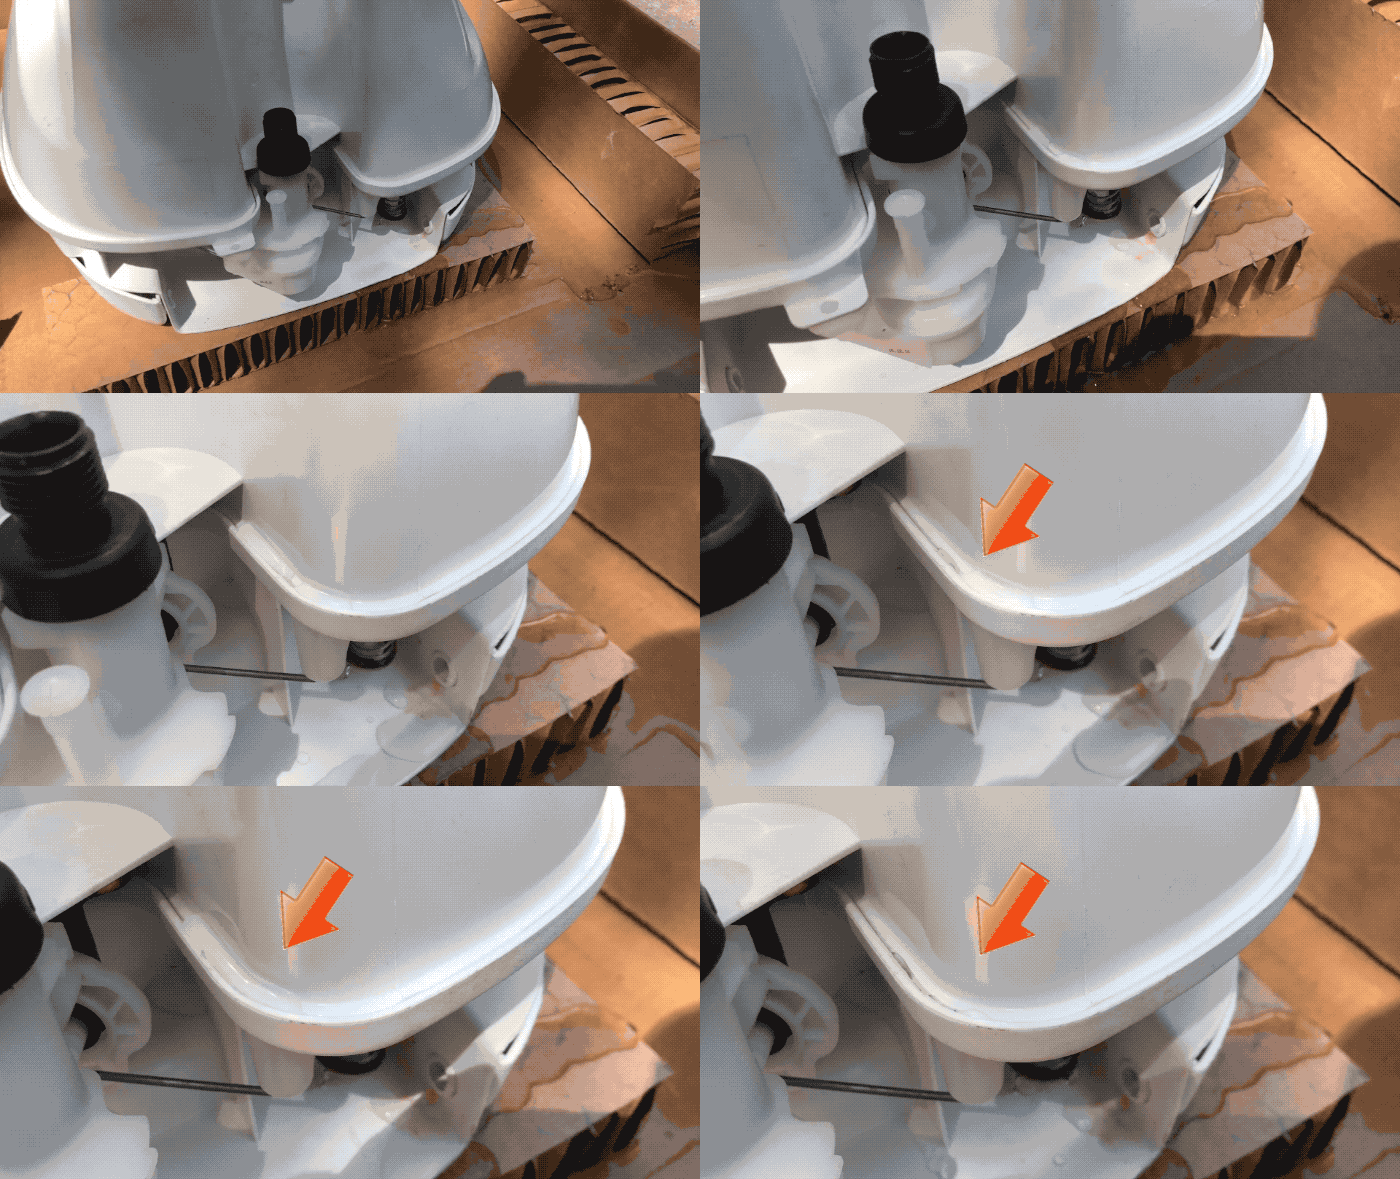
A quick clip showing the leak. Click on the link below for a better quality video.
Since the toilet had already been replaced about 6 months before, I decided to reach out to Thetford directly to see if this really could be the source of the odor. The technician that assisted me seemed eager to assist. We emailed back and forth, and I even sent a video of the leaking seam. Thetford immediately determined that the toilet was defective and sent me a new one.
I have a working toilet so for now the Dometic will stay. But maybe some day I’ll run a bead of caulking around the defective seam and reinstall the old one just to see if that was actually the source of the problem. Or maybe I’ll install the new one that was just sent to me. What are the chances that 3 toilets in a row would have the same problem? Then again with our luck…
If you’re having waste issues in your RV with the Thetford toilet don’t just accept it – something is wrong! We don’t use tank treatments (that really just mask odors and sometimes smell just as off-putting as anything else in the tank), and with our now properly sealed system, we still have no odors at all. To properly diagnose the problem I offer up the following steps that ultimately led us to a solution. Again we are not professionals so you should always verify that any work you do won’t void your warranty.
1. You first want to make sure that the odor isn’t actually coming from the grey water tank. In our RV the vent pipe for the grey and black are connected together so there’s a chance that odor could backwash down the vent pipe and up through the sinks. Run water through all of your sink and shower drains. You can even plug the drain and add a little water to the sink to be sure that everything is sealed. Take a drive to verify that the odor is still present.
2. If the smell is still present, then the odor isn’t in the grey tank. You can then mask off the toilet as we did in Chapter 21. This was a pain to do, but it proved to us without a doubt that the odor was at the toilet and nowhere else.
3. Inspect the 2 bolts that hold the toilet to the floor. Verify that these bolts are tightened.
4. Remove the toilet and inspect the flange. Many toilet problems can be solved by replacing the seal between the toilet and floor flange.
5. Flip the toilet over and fill the body with water. If water leaks through any of the seams then so can waste odor. Replace the toilet and get RVing!
I would like to thank the fine folks at both The Interstate Blog (interstateblog.blogspot.com) and Roadtrek Life (roadtreklife.blogspot.com) for having the same stinky model of toilet and for both braving the smelly ordeal of replacing it so that others could see that sometimes (most times?) you can rely more on fellow owners than the service centers or even manufacturers for tracking down a problem and finding the solution.
So this marks the end of our toilet talk, but it isn’t, however, the end of our problems. We’ll get to that in another Chapter, and maybe even dive into some modifications that we did to improve the functionality of the wet bath sink and shower. Until then we count down the days ’till the next Hershey RV Show!